A good and beautiful manicure is an important component of the image of a woman. Making a manicure, the fair sex hope that it will last long on the nails, and will not spoil an important event or vacation.
Experts of the beauty industry solved the problem and invented such a tool for manicure as shellac. For several years now, he has been given preference instead of building up.
Shellac - This is a special coating for nails, which combines the properties of varnish (ease of application on the nail plate, attractiveness) and gel, which allows you to make a manicure durable, protects the nail from water. The main difference between shellac and gel polish is that it lies on the nail with a light, weightless layer, does not damage its structure and protects the nail from mechanical damage. Unlike gel varnish, shellac is removed only by liquid.
The benefits of manicure with shellac

One of the main advantages of creating a manicure with shellac is the simplicity and convenience of its application. It is enough to purchase a special UV lamp for drying nails, after which you can start experiments and create a beautiful, neat and durable manicure at home.
But, of course, there is a number of other benefits of shellac manicure:
- The composition of shellac does not contain such harmful substances as toluene and formaldehyde. This means that pregnant women and people with allergies can apply the product;
- The tool lasts a long time;
- Attractive appearance of manicure: rich tone and natural gloss;
- Shellac is easily removed, does not damage the nail plate;
- Resistance to manicure damage;
- Large color palette - about 61 colors;
To keep shellac well on nails, it is enough to treat it only with a degreasing agent. No need to cut the nail or remove the top layer.
Interesting fact: shellac is a waste product of insects living on tropical trees. Such a unique composition of the product helps to protect and strengthen the nail plate.
So, to create a manicure with shellac at home, you need to prepare special tools and materials, which will be discussed further.
Preparation of tools and materials

There is a base a set of necessary tools and materialswhich will allow you to easily make a beautiful manicure with shellac at home. It includes:
- 36 W ultraviolet lamp. If you buy a UV lamp of lesser power, there is a chance that the varnish layers will not “grab”. Manicure in this case will not work;
- Degreaser for nails. Often it is purchased in the same place as the manicure set for Shellac. In extreme cases, you can use regular medical alcohol;
- Base or base coat;
- Colored shellac;
- Top coating (finish);
- Nail file or buff;
- Orange stick;
- Lint-free napkins (the nap will spoil the manicure, and you have to remove the shellac and apply it again). Necessary to remove the adhesive layer at the final stage;
- Liquid for removing shellac.
We recommend to acquire a base, finish and color varnish. CND trademark. This is due to the fact that only the official manufacturer gives a guarantee of quality. You can buy, of course, cheaper counterparts. But, with them a quality manicure will not work. Saving, you do not get the desired result - a neat, persistent and beautiful manicure.
Step-by-step instructions for applying shellac

If there is no desire, time and money to contact a specialist, you can cover your nails with shellac at home. The task is not easy, but you can learn.
Before we describe successively instructions for applying shellac, pay attention to A number of tips that should be followed:
- Prepare everything you need: determine the color of the varnish, connect the UV lamp, process the surface of the nails;
- Shellac is attached to the nail and hardens only under UV radiation. Therefore, each finger, after applying shellac to the nail, must be kept under the lamp;
- To make the manicure look neat for up to 3 weeks, it is necessary to prepare the nail plate: sanitized, sanded if necessary, processed. Be sure to monitor the condition of the cuticle, it will help the nail to breathe and get the necessary nutrition.
Due to its structure, gel polish does not roll like a normal varnish. And this means that you can create a variety of designs on the nails.
We process the nail plate

Step 1: file we process the nail plate, and also remove the cuticle before applying shellac. The nail needs preparation, so it is important to soften and remove the cuticle.
Decide on the shape of the nail, its length and polish the surface. This is necessary to eliminate the glossy shine, and not to thin the nail. So do not overdo it.

Clean your nails from dust and dirt, it will allow to wear a manicure longer.
Having completed the grinding with a special file or buff, removing all the microcracks from the nail, you should proceed to the next step.
Degrease the nail

Step 2: degreasing the nail plate. The material must mate with the surface and lie flat on the nail. To do this, the nail is degreased: using a smooth cotton pad, wipe the nail with a special agent or ordinary medical alcohol. After that, a primer is applied, which should be dried naturally.
It is necessary to degrease the nails immediately before applying shellac. It is very important not to touch them anymore, as oily stains will appear again.
Apply base coat

Step 3: we put the main layer. This step resembles the application of conventional decorative varnish. A base coat is applied from the base of the nail to the tip. It is very important to leave a gap between the skin and the coating of 2 mm.
Remember that the base layer must be sealed. This is done by coating the end of the nail.
After the base coat has been applied, place a finger in the UV lamp for 10 seconds. Time varies with sensitivity and individual portability, as well as lamp power.
We cover with a color layer

Step 4: begin to cover your nails with colored shellac. Try to apply the varnish closer to the cuticle so that the manicure looks more neat. After selecting the color of shellac, apply the first layer, then send it to the UV lamp for 2 minutes.
In the same way apply the second layer and dry it in a UV lamp. It all depends on your preferences, but practice shows that if you leave one coat of varnish, the tone will turn out to be translucent.
Apply top coat

Step 5: we fix the work. The last layer should be the most dense, apply it on the entire surface of the nail and seal. Place your fingers in the UV lamp for 2 minutes. Be careful that there are no stains and irregularities. If you allow negligence at this stage, you will have to redo the manicure and apply shellac again.
Manicure with shellac at home at this stage is considered to be almost complete. It remains to remove the adhesive layer. This is done with a degreaser and lint-free cotton pad.
After completing the above steps correctly, you will get a beautiful uniform manicure. He will not wrinkle, will not burst and will delight you for at least 3 weeks.
How to attach rhinestones?

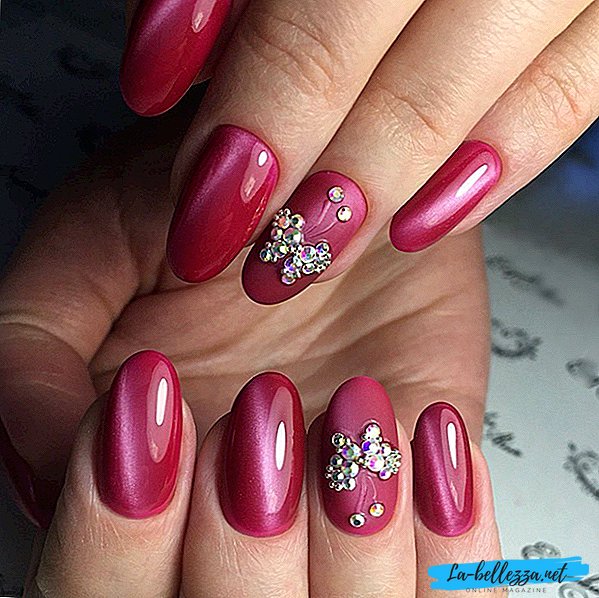
Manicure with shellac and rhinestones - extravagant direction in the field of nail art. It is recommended to make rhinestones one or two nails, while carefully choosing colors. Marigold will become neat and elegant look, not making the image vulgar.
Glue rhinestones are an imitation of stones of different sizes. One side is flat, the other is raised. To nails decoration is attached with a smooth surface. It is necessary to attach rhinestones to shellac correctly, otherwise there is a risk that they will crumble very quickly.
The technology of applying rhinestones to shellac step by step:
- Step 1: cover the nails with shellac, polymerize the layer in the ultraviolet lamp. The coating must be sufficiently cured. Only in this way the fastening of stones will be strong, and the drawing will not be greased;
- Step 2: on the drawing created and thought out in advance, apply “stones” with tweezers or a toothpick. You can use a sharp wand, then it is dipped in water or varnish;
- Step 3: Wait for the glue to dry so that the crystals adhere well. Remember that rhinestones are applied on top coat after the basic manicure has been completed;
- Step 4: fix the work by applying the top without a sticky layer and dry in the UV lamp for 2 minutes.
When applying rhinestones, use a special glue or gel. In extreme cases, you can use a transparent varnish and fixer, but such tools make rhinestones less shiny.


How to make a drawing on the nails?

Monochromatic shellac can quickly become boring. If you are a lover of bright and original nail design, you can diversify your manicure. To do this, apply:
- Drawings - prepared, or drawing with a thin brush;
- The combination of shellac in different colors;
- The use of figures, stickers, sparkles, stripes.
To date, 2 techniques of creating drawings on the nails are especially popular: casting and dots.

Beautiful pattern of shellac on the nails can be performed in an unusual, but very popular casting technique. To do this, you will need to purchase a transfer foil, black gel-paint and a thin brush.
The drawing is done with a thin brush, and then dried in an ultraviolet lamp. Next, a shiny foil layer is imprinted on the sticky layer of gel ink. Nails can be designed in this way both on a matte finish and on a glossy one.


When performing a manicure using a casting technique, it is worth adhering to a number of tips:
- When printing the foil, you need to gently and firmly press it, then with a sharp movement to tear it from the nail. Repeat the movement until you get the desired result;
- Dark paint should be used as a base for casting. This will give depth to bloom;
- Cast on nails cover with a finishing coating or clear lacquer to protect the drawing from abrasion.
You can diversify monophonic manicure with shellac and using dots.

Dots (from the English. dots - points) - this is a two-way tool with two balls at the ends, the magnitude of which can be very different. With the help of dots, you can create pictures in the form:
- Pea;
- Points;
- Stripes;
- Commas.
If you do not have a professional tool, you can replace it with a hairpin, a pen, an orange manicure stick or a toothpick.

One of the easiest ways to use dots at home is to draw dots. To do this, apply a few drops of varnish with a brush on the palette. Dip the tip of the tool in the lacquer and move the lacquer onto the nail plate with a slight movement. You get circles of different sizes.
With the help of dots you can draw straight lines or curls. To do this, also dip the tip of the tool in the lacquer and paint on the nail, bring the pattern into the necessary shapes and lines. Slowly draw, stretching a drop of varnish in the desired pattern.


The main mistakes when applying shellac

In order for a manicure with shellac to last longer on the nails, you must follow the instructions for applying it. Performing all the actions consistently, you will provide a lasting and beautiful manicure for at least 3 weeks.
So do not let the following errors when applying shellac:
- Do not forget to lubricate the cuticle softening oil. This will help keep the manicure in a neat form for a longer period.
- Do not mix varnishes from different companies. Coating for nails of different production differs in composition and structure. The steps of applying and removing shellac complement each other to create a smooth and durable coating. If you experiment with different manufacturers, the products can "come into conflict." For example, the primer may not work, and then the coating will not mate with the nail. The result - shellac will peel off after a few days.
- Do not remove your hands from the UV lamp before the special signal sounds. The timer is set so that the coating dries to the desired degree.
- Do not remove shellac yourself. Without knowing all the subtleties, you can damage your nail plate. If you are going to remove shellac at home, use a special removal fluid.
- Do not tear off flaky edges. If you see that the gel varnish is peeling off somewhere, do not bite your nails and do not peel off the shellac. You can damage the top layer of the nail plate. It is better to make a correction for this nail at home.
By following the recommendations and instructions outlined in the article, you can achieve a beautiful and lasting manicure with shellac.