A traditional holiday for Christians is celebrated all over the world.
In all stores for this event the range of goods is changing.
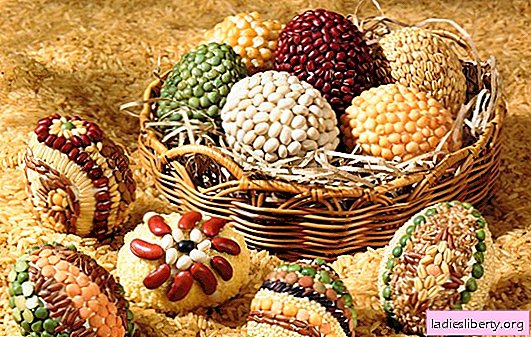
Easter eggs, Easter eggs, stencils for painting eggs, Easter baskets and rabbits, Easter cakes appear.
Many of these things can be done at home. Today's master class is dedicated to this.
DIY DIY crafts "Garland"
Such a garland will effectively look at a vertical surface: walls, curtains, curtains, stairs. It is made simply from "obedient" material without the use of a sewing machine.

Materials and tools: multicolored Firth, scissors, clerical glue, satin ribbon, 2 pins, 1 sheet of paper, pencil, scissors.
Stage 1
Plain paper is taken. A paper-shaped egg is cut from it. It will serve as a model for cutting crafts from felt.
Stage 2
A paper sample is placed on a piece of felt. A blank is cut from the fabric.
Stage 3
The required number of textile blanks is cut.
Stage 4
Each textile egg is unusually decorated. You can glue felt mugs in some places. You can - strips.

Stage 5
To top it off, two holes are made in the upper part of the textile eggs. A satin ribbon is threaded through them, for which the Easter garland will be hung. To securely fasten the tape, adhesive is dripped from each felt behind each egg. When it dries, Easter crafts. Do it yourself, you can use it.
DIY Easter crafts "Egg with a surprise"
Such eggs with surprises are not traditional for the holiday. Therefore worth your attention. This is an amazing and pleasant surprise. It is sure to be remembered by all guests.
Materials and tools: raw chicken eggs 10 pcs., plate, multi-colored acrylic paint, brush, paper, scissors, awl, medical syringe, pencil or pen.

Stage 1
Raw chicken egg is taken. A hole is made in the lower part with an awl. Through it, the yolk and protein are sucked. You can do this with your mouth, or with a syringe.
Stage 2
Hot water is necessarily pumped into an empty egg to rinse the internal cavity and prevent the formation of rot and fungus.
Stage 3
The egg is gently wiped dry. Using acrylic paints, a picture is drawn on it.
Stage 4
While the paint dries, a congratulatory inscription or a wish is prepared. To do this, a strip is cut out of paper. Pleasant words are written on it with a pencil or pen for the addressee.
Stage 5
The strip with the inscription is folded into a tight tube, which is inserted into the hole in the egg.
Stage 6
The same manipulations are done with the rest of the raw chicken eggs to create an Easter DIY craft. If desired, each egg can be packed in a gift box or put them all together in a festive decorative basket.
DIY handmade crafts "Gift basket"
Such a craft is made from an ordinary paper bag from a store. You can replace it with a candy box. In it, you can safely present Easter eggs to neighbors or relatives.

Materials and tools: paper bag or candy box, scissors, thermal gun and glue, ruler, pencil.
Stage 1
A paper bag is taken. His bottom is cut off. The package is cut into two parts along its lateral folds.

Stage 2
3 cm wide strips are made of the resulting paper rectangles. To do this, they are first drawn with a pencil using a ruler and cut out.
Stage 3
Each resulting strip bends in half along its length.

Stage 4
Do-it-yourself Easter basket is woven from strips.

Each tip of the strip is glued with a thermal gun and glue to the two sides of the square, as shown. Excess length of strips is cut off.
Stage 5
The sides of the Easter crafts rise and stick together in a voluminous basket.

Stage 6
Handles are taken from the bag cut at the beginning. They are twisted together in a spiral. Now they stick to the craft as a single pen. If necessary, you can use a thermal gun and glue for reliable twisting of the handle.

It turned out a wonderful Easter DIY craft. You can decorate it by putting a textile napkin and painted eggs inside.
Easter crafts "DIY plaster eggs"
Buying Easter eggs at the grocery store is optional. You can make them manually after going to the hardware store.

Materials and tools: alabaster (or building gypsum), a container for mixing the mortar, a measuring cup, a tablespoon, a knife, an ordinary cardboard cup, an exact copy of an egg (plastic), duct tape, funnel, sandpaper.
Stage 1
A plastic egg shape is taken. A small hole is cut with a knife from its lower blunt side. It is necessary for the subsequent filling of alabaster.
The plastic mold must necessarily open horizontally or vertically in two halves.

Stage 2
Alabaster is taken and a solution is prepared: 5 tablespoons need to be dissolved in 180 ml of water. It is taken into account that tablespoons of alabaster are taken with a slide. It is important to get a solution of density equal to sour cream. Lumps in the solution are unacceptable. Otherwise, it will ruin the entire product.
Stage 3
A plastic egg is installed in a cardboard cup with the hole up. Through it, a solution is poured into the egg using a funnel. The used funnel is immediately rinsed in running water under the tap. This will help keep the funnel intact for a long time.

Stage 4
The solution will harden for one hour. Checking the degree of hardening is simple: try piercing the gypsum with something thin and sharp. After hardening, the plastic egg can be opened. All irregularities in the resulting egg can be treated with sandpaper.

Using the familiar technology, the necessary amount of Easter crafts is prepared by hand.