Flexibility is not just beautiful, it is also the health of the joints, proper posture and well-being. That is why in recent years a variety of stretching exercises have been so popular among women and girls of various ages. One of the most popular are exercises for twine, which can be performed at home.
What is twine, what are the varieties
Twine is a gymnastic exercise in which an angle of 180 degrees is formed between the straightened legs stretched out in opposite directions. Twine is an integral part of the training of many athletes, dancers, circus artists, etc. Performing twine loads the muscles and ligaments of the legs, which leads to the appearance of a beautiful relief and harmony of the limbs. Therefore, it is recommended to stretch after any physical exertion, even if there is no purpose to sit on the twine specially.
Twine can be of the following varieties:
Longitudinal (in a sitting position facing one leg),
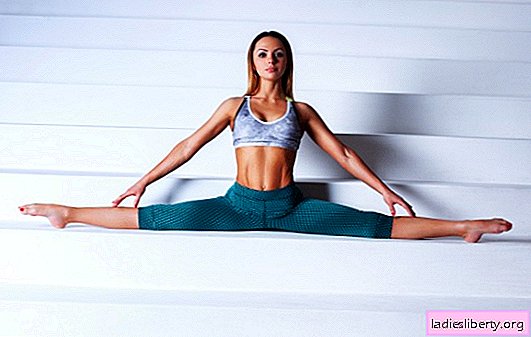
· Transverse (performed sitting face forward with legs spread to the sides),
· Static (performed on the floor),
Dynamic (performed while standing),
· Classic (angle between legs 180 degrees),
Sagging (the angle between the legs is more than 180 degrees).
It doesn’t matter which type of twine you like best and which one you want to master, exercises for twine at home will help to stretch your muscles and ligaments, but you need to follow a number of rules.
Warming up before stretching
Before you begin to perform exercises for twine at home, you need to warm up the muscles well. You can choose one of the options:
Jumping rope for 10-15 minutes.
Running in place at an average pace for 10 minutes.
Squats and jumps.
Swing and tilt.
If you were engaged in any physical activity (strength training, aerobic exercise) before stretching, then you can start the exercises for twine as a hitch to the main training.
A hot shower warms muscles well: it can be taken as an alternative to the mentioned training options or in addition to them.
Exercises should be carried out in comfortable clothing, nothing should be pressed, crushed or hamper movement. It is useful to protect joints (ankles, knees) with warm leggings, as ligaments like heat and are easier to stretch when warmed. It also avoids injuries. For the same reasons, it is not recommended to perform twine exercises at home with an open window or in a cold room.
When you have warmed up, you can proceed directly to the stretching.
Basic principles for performing exercises, frequency
When performing the twine, the adductors and hind muscles of the thigh, hip joints, hamstrings, and lumbar muscles are actively involved. It is on the stretching of these structures that the main work should be directed.

Since the flexibility of the joints and ligaments is a genetically determined indicator, it is impossible to say exactly how long it takes to master the full split. For the same reason, it is impossible to unequivocally state which training regimen is the most optimal. For someone, a month of training 2-3 times a week will be enough, but someone will not be able to sit down for three months of daily training.
Nevertheless, in compliance with the execution technique, in the absence of radical deadlines (I want to sit on the twine in a week) and systematic loads in a couple of months, it is really possible to sit on the longitudinal twine. Cross, sagging and dynamic splits are already the property of professional activity and require significantly more training and good physical shape.
The mode of training should be selected based on its capabilities: a training session of less than 30 minutes will not bring any effect, therefore it is better not to take all sorts of calls "Sit on a twine for 5 minutes a day". If there is such an opportunity, it is better to stick to daily training, then the result will come faster and less stressfully. If you find it difficult to allocate half an hour every day, you can do it 3 times a week for 60-75 minutes, this will also lead to the desired effect pretty soon.
It should also be remembered that stretching, as well as any physical form, without training is lost very quickly, so if you want to maintain your skills in working condition, you will have to perform twine exercises constantly.
There are several basic principles for performing such exercises:
· Always keep your back straight, do not slouch.
· The breathing is even, it is not necessary to hold it, this allows you to relieve muscle tension and reduce pain.
· All movements are smooth, without harshness.
· In each position you need to linger for at least 30-60 seconds.
Basic exercises for twine
1. Fold: can be performed standing or sitting.
· Keep legs straight, knees not bent.
· With a straight back, we bend to the legs, trying to touch their ribs, not the head.
· If possible, press your stomach against your hips. Hold in this position for 30-60 seconds. Exhaling, we try to draw ourselves closer and closer.
Most likely, it will not work out immediately in half. Nothing wrong! The main thing is not to round the back, but to stretch precisely with ribs. At first, lower as much as the condition of the back and hamstrings allows, at least 40-45 °. Each successive time it will turn out better. Help yourself with your hands, pull yourself to your feet. Remember: the pain will be at first, but it should be easily tolerated. If you feel that somewhere you pull very hard or shoot sharply, the exercise should be stopped immediately and carefully (!!!) return to the starting position. This is true for all exercises.
2. Lunges

IP: We get up straight, put one leg forward.
The pelvis is not deployed, the back is straight.
We bend the exposed leg to 90 °, if necessary, set the second leg back a little. The angle between the inner surfaces of the thighs should be almost 180 °, but due to the fact that we bent one leg at the knee, the exercise should be performed without pain.
Hands lower to the floor. At first, just put your palms next to your foot. Later, you need to lower yourself on your elbows, placing them on the inside of the thigh.
Hold in this position for 30-60 seconds. Change legs.
Variations of exercise with support on the knee are possible.

3. Angle: performed from a standing position.
Starting position: see previous exercise.
The pelvis is not deployed, the back is straight. We bend to the exposed leg, with our hands we try to get the floor on both sides of the foot.
The ribs are pulled to the front of the thigh.
We put on the toe of the exposed foot, we can grab it with one hand.
Hold in this position for 30-60 seconds. Change legs.
If at first it is difficult to reach with your hands to the floor with a straight back, lower yourself as much as you can. You can simply touch the knee of the exposed leg, then try to reach the shin, etc. The main thing is not to round the back and pull the ribs to the leg, and not the forehead.
4. Ballerina: can be performed standing at the table (window sill, Swedish wall), as well as lying on the floor.
Standing option:
Put a straight leg on the windowsill (table, etc.). The main thing is to choose a height so that the angle between the legs is at least 90 °.
With a straightened back, we drag the ribs to the thigh. You can help yourself with your hands.
If it turns out, grab the foot and lay on his stomach with his stomach.
The second leg in the knee is not bent.
Hold in this position for 30-60 seconds. Change legs.
Lying option:
Lying on your back, bend your knees and place your feet on the floor.
Raise one leg, straighten in the knee and serve.
Grasp the leg with your hands (where we get it: by the knee, lower leg or ankle) and pull it towards you. We do not tear our heads off the floor.
Keep the raised leg straight, do not tumble the second leg to the floor and do not twist the pelvis.
Hold in this position for 30-60 seconds. Change legs.
If the exercise does not work out correctly at all, take a tape, belt or expander, put it on your outstretched leg (ankle or lower leg) and pull it towards you, holding on to the ends of the device. Press the back to the floor, do not overwhelm the pelvis on its side.
Perform these exercises systematically and correctly, and beautiful twine will be provided to you soon!